
How to Disassemble an Xbox 360 S and Replace the Thermal Paste (Complete Step-by-Step Guide).
Over time, the factory thermal paste inside your Xbox 360 S (Slim) dries out and loses its ability to transfer heat efficiently. This leads to overheating, loud fan noise, and a higher risk of hardware failure. Fortunately, you can fix this issue yourself at home with a bit of patience and the right tools.
In this detailed guide, we will walk you through the entire process—from opening the outer shell and replacing the thermal paste to putting your console back together safely.
Tools and Materials Needed:
- Plastic prying tool (spudger)
- Small flathead screwdriver
- Torx T10 and Torx T8 screwdrivers
- Isopropyl alcohol (90% or higher)
- Paper towels or cotton swabs
- Quality thermal paste
Phase 1: Opening the Outer Plastic Shell
1. Removing the Top and Bottom Grilles
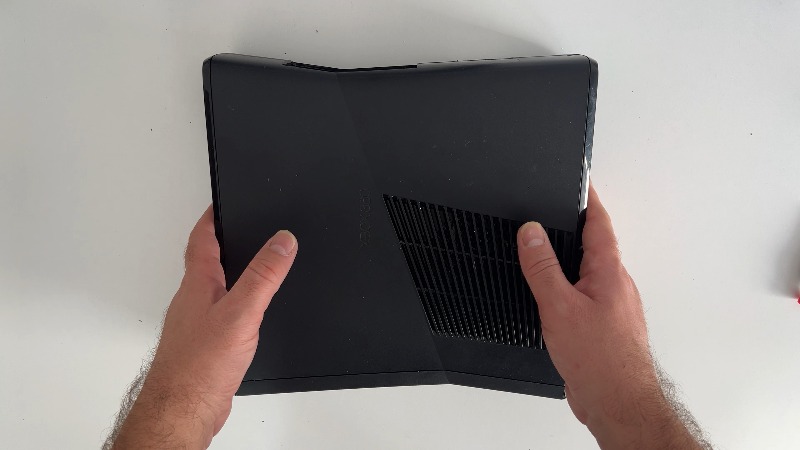
Insert your plastic prying tool into the gaps around the edges of the top ventilation grilles to release the plastic clips, then pull the grilles off. Next, gently pry the clips off the inner top grille panel using a flathead screwdriver.
Insert your plastic prying tool into the gaps around the edges of the top ventilation grilles to release the plastic clips, then pull the grilles off. Next, gently pry the clips off the inner top grille panel using a flathead screwdriver.
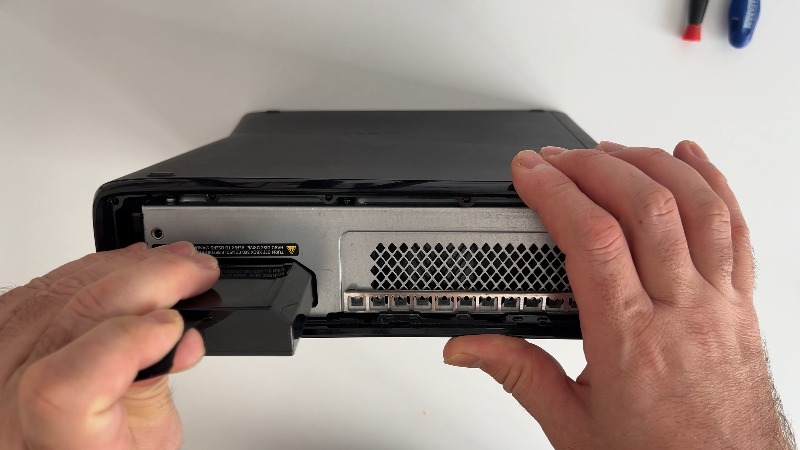
Turn the Xbox upside down (bottom side facing up). Remove the bottom grille covering the hard drive bay, and then remove the other part of the bottom grille as well. If there is a hard drive in the console, pull out the hard drive caddy. Carefully separate the clips on the underside grille panel using a flathead screwdriver.
2. Unclipping the Casing and Removing Side Panels
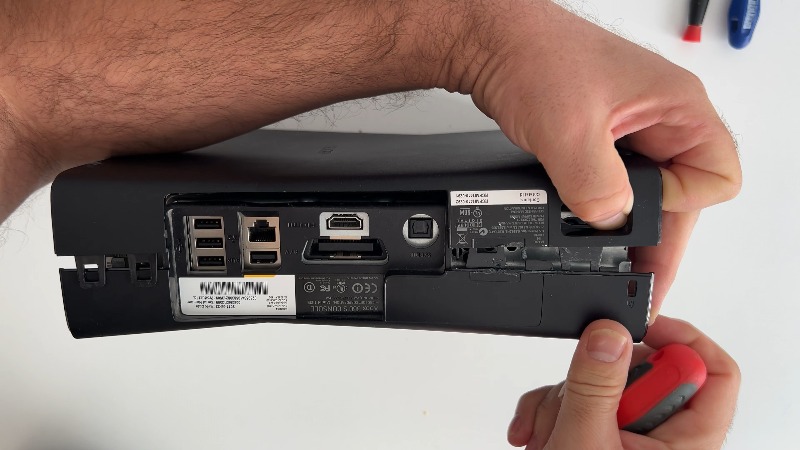
Now it is time to separate the two halves of the plastic casing:
Now it is time to separate the two halves of the plastic casing:
- Unclip the large plastic tabs on the top side of the console.
- Flip the console over and unclip the large plastic tabs on the underside.
- Release the plastic tabs on the back of the console while keeping both halves of the casing under slight tension so they don't snap back together.
- Once the tabs are free, remove the right side panel (the cover).
Phase 2: Disassembling the Internal Components
3. Unscrewing the Metal Casing
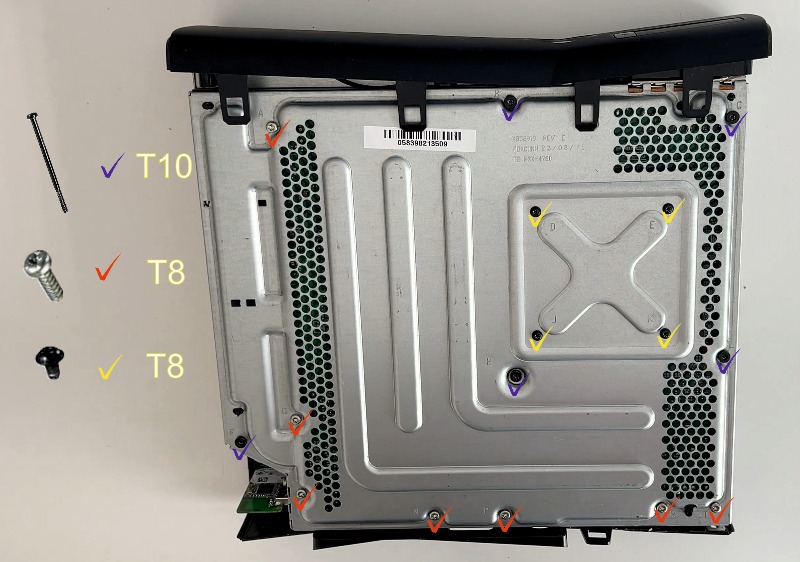
Locate and remove the 5 long black Torx T10 screws (which secure the outer shell) and the 8 silver Torx T8 screws (which secure the motherboard and internal plastic parts, such as the hard drive bracket). Once unscrewed, you can remove the left side panel (the lid).
Locate and remove the 5 long black Torx T10 screws (which secure the outer shell) and the 8 silver Torx T8 screws (which secure the motherboard and internal plastic parts, such as the hard drive bracket). Once unscrewed, you can remove the left side panel (the lid).
4. Removing the Front Panel, RF Module, and Wi-Fi Module
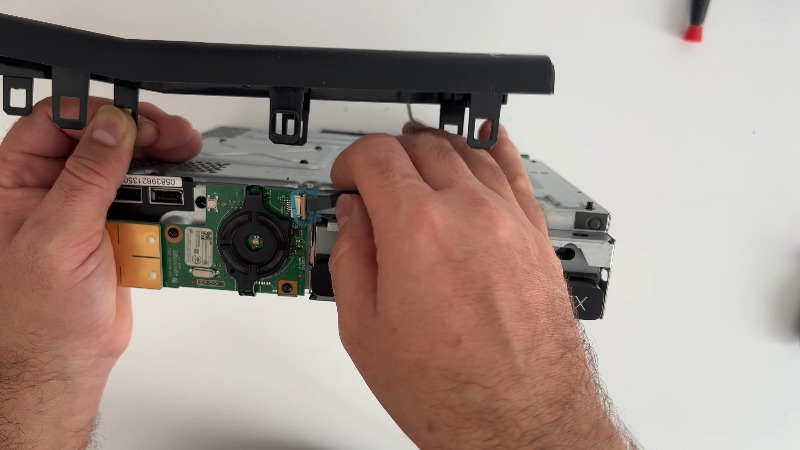
- Gently pull the front panel (where the power button is located) outwards. Be extremely careful—unclip the connector and pull out the thin ribbon cable, making sure not to tear it.
- Unscrew the two Torx T8 screws holding the small power/sync button circuit board (RF module) to the front of the metal cage and pull it off.
- Turn the console so that the Wi-Fi module is facing up, remove the single Torx T10 screw holding it in place, and pull the module straight out.
5. Removing the DVD Drive and Hard Drive Tray
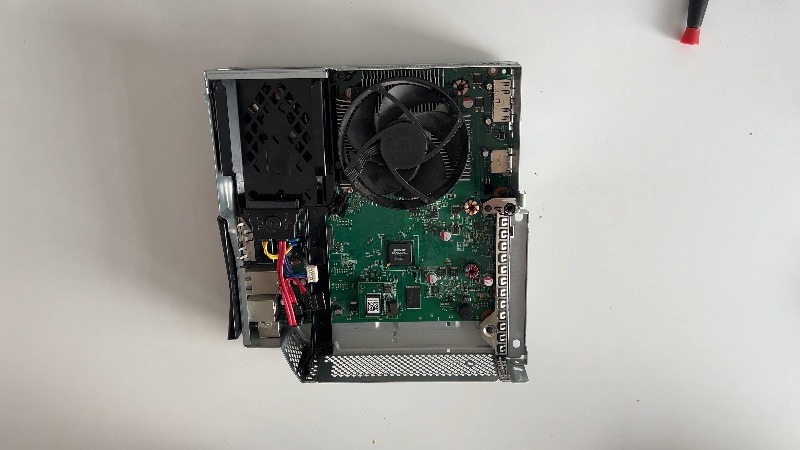
- Lay the Xbox console down flat, remove the top metal shield, and lift off the plastic air deflector from the fan.
- Rotate the console, disconnect the SATA and power cables from the back of the DVD drive, and remove the drive.
- Remove the plastic DVD disc drive support bracket brace. If you want, you can also remove the internal 4GB memory card at this stage.
- Disconnect the cables from the hard drive connector and remove the plastic bracket for the hard drive tray.
Phase 3: Motherboard Removal and Thermal Paste Replacement
6. Removing the Motherboard
Disconnect the fan connector from the motherboard. Turn the console upside down and unscrew the four black Torx T8 screws holding the heatsink. Flip the console back over and carefully lift the motherboard out of the metal cage.
Disconnect the fan connector from the motherboard. Turn the console upside down and unscrew the four black Torx T8 screws holding the heatsink. Flip the console back over and carefully lift the motherboard out of the metal cage.
7. Releasing the X-Clamp
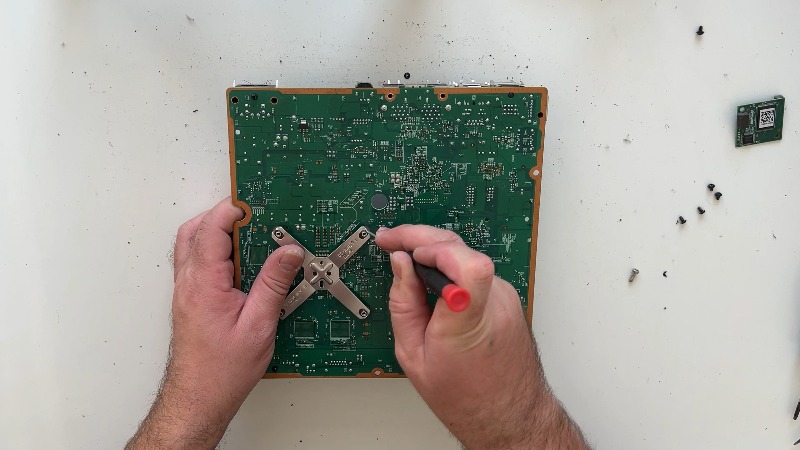
Be very careful not to scratch the motherboard! Insert a small flathead screwdriver (or a specialized X-clamp tool) into the groove beneath one of the X-clamp corners where it hooks onto the heatsink post. Gently pry upward and push outward until the corner pops free.
Be very careful not to scratch the motherboard! Insert a small flathead screwdriver (or a specialized X-clamp tool) into the groove beneath one of the X-clamp corners where it hooks onto the heatsink post. Gently pry upward and push outward until the corner pops free.
8. Cleaning the Old Paste and Applying New Thermal Paste
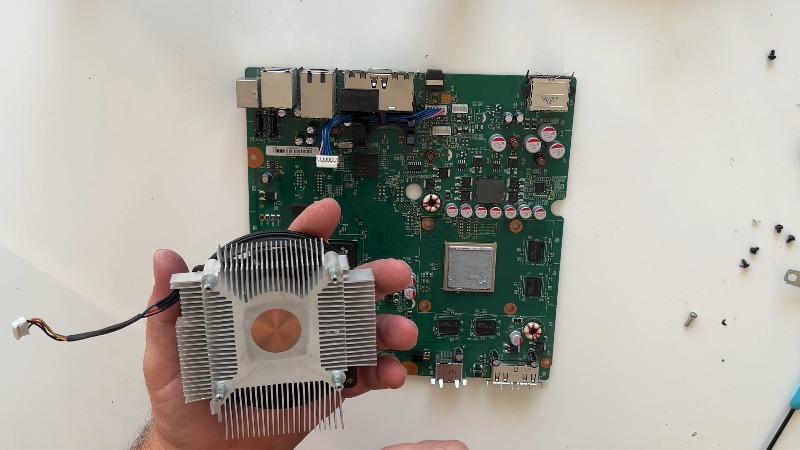
- Apply isopropyl alcohol to a paper towel or cotton swab. Thoroughly wipe away the dried-out original thermal paste from both the processor die and the copper base of the heatsink until both surfaces are completely clean and shiny.
- Apply fresh thermal paste. You can spread it precisely all over the surface of the processor, or simply put a small pea-sized drop directly on the center of the clean processor chip (the pressure from reinstalling the cooler will distribute it evenly).
9. Reinstalling the Heatsink and X-Clamp
Carefully lower the heatsink straight down onto the processor, aligning its pins with the holes in the motherboard. Turn the board over, hook the two adjacent corners of the X-clamp into their brackets, and press the remaining two corners down with your thumbs until they click firmly into place.
Carefully lower the heatsink straight down onto the processor, aligning its pins with the holes in the motherboard. Turn the board over, hook the two adjacent corners of the X-clamp into their brackets, and press the remaining two corners down with your thumbs until they click firmly into place.
Phase 4: Reassembling the Console
10. Reinstalling the Motherboard and Internal Brackets
- Connect the fan connector back to the motherboard and lower the board into the metal cage.
- Tighten the four black Torx T8 screws that secure the heatsink to the metal chassis.
- Connect the SATA and power cables from the hard drive to the motherboard, and reinstall the hard drive bracket along with the DVD drive support bracket brace.
- Turn the console casing upside down and screw in the 8 silver Torx T8 screws that secure the internal plastic parts.
11. Reinstalling the Modules, DVD Drive, and Metal Shield
- Return the RF module to its place and secure it with the two Torx T8 screws.
- If you removed it earlier, mount back the internal 4GB memory card.
- Connect the SATA and power cables to the back of the DVD drive and place it back into the housing.
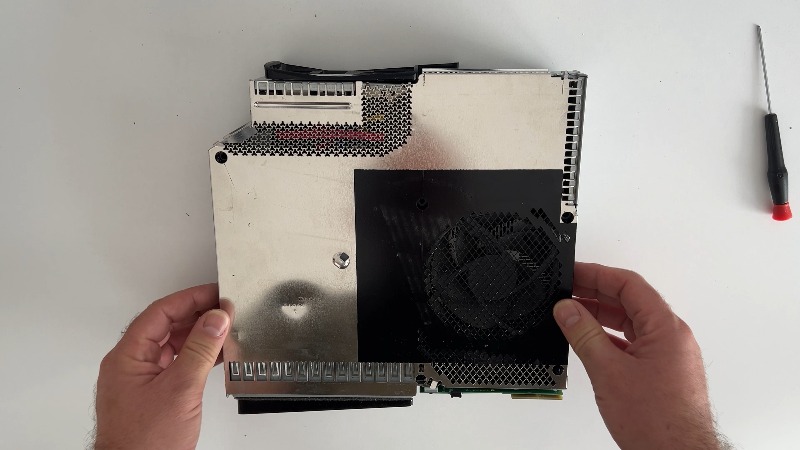
- Place the plastic air deflector onto the fan and put the top metal cover back on.
- Slide the Wi-Fi module straight into place and tighten the single Torx T10 screw.
12. Closing the Outer Plastic Casing
- Place the top plastic cover (with the air circulation holes) onto the console, flip it over, and screw in the 5 long black Torx T10 screws.
- Install the lower large plastic cover.
- Take the front panel with the power button and carefully connect the ribbon cable to the connector—making sure not to tear the delicate cable—then snap the panel into place.
- Finally, mount all the remaining plastic panels and grilles on the top and bottom sides of the console, and slide your hard drive back in if you have one.
Conclusion
Your Xbox 360 S is now clean, equipped with fresh thermal paste, and ready for many more hours of quiet, cool gaming. Replacing the thermal paste every 2 to 3 years is a great way to prevent overheating and extend the lifespan of your console.