
Here is a detailed, step-by-step guide for repairing damaged firmware on a Realtek RTS5732DL SSD Controller.
How to Fix Corrupted Firmware on a Realtek RTS5732DL SSD Controller
Have you ever encountered a situation where your computer suddenly stops recognizing your SSD, or detects it with an incorrect capacity? A common culprit behind this issue is a corrupted controller firmware.
In this guide, we will walk you through the complete step-by-step process of resetting and reflashing the firmware on a Realtek SSD controller. For this demonstration, we are using a KingSpec P3 120GB SSD powered by the popular Realtek RTS5732DL chip.
⚠️ IMPORTANT WARNING: This process is highly destructive and will permanently delete all data on your SSD. Make sure to back up any critical files before proceeding, if the drive is still accessible.
Tools and Preparation
Before opening up your SSD, make sure you have the following ready:
- USB to SATA adapter – Used to connect the SSD to your computer.
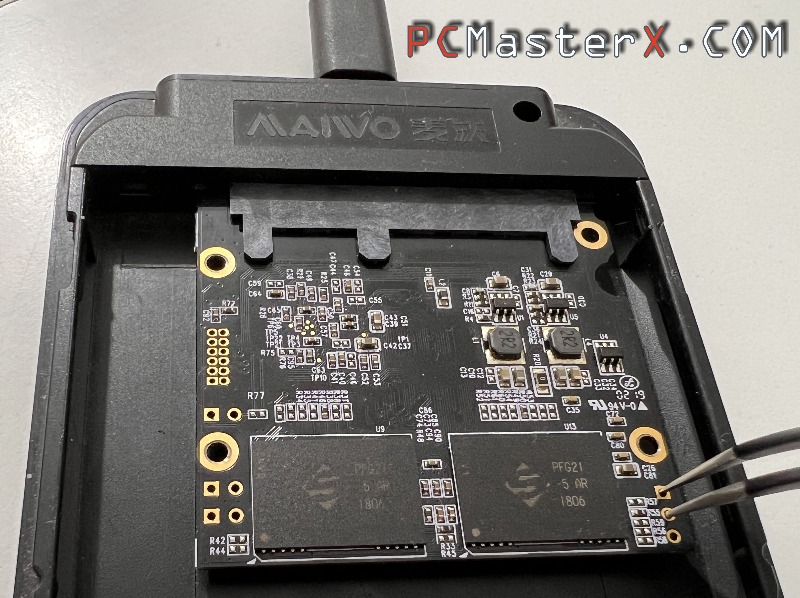
- Jumper or tweezers – Needed to short the ROM pins.
- Required Software
- The RTL Flash ID https://www.usbdev.ru/files/realtek/rtlflashid/
- The Realtek SSDMP Tool. https://www.usbdev.ru/files/realtek/rts5732dlssdmp/
This video shows: In this video, I will show you how to reset and re-flash the firmware on a Realtek RTS5732DL SSD Controller.
Step 1: Identify the Controller and ROM Pins
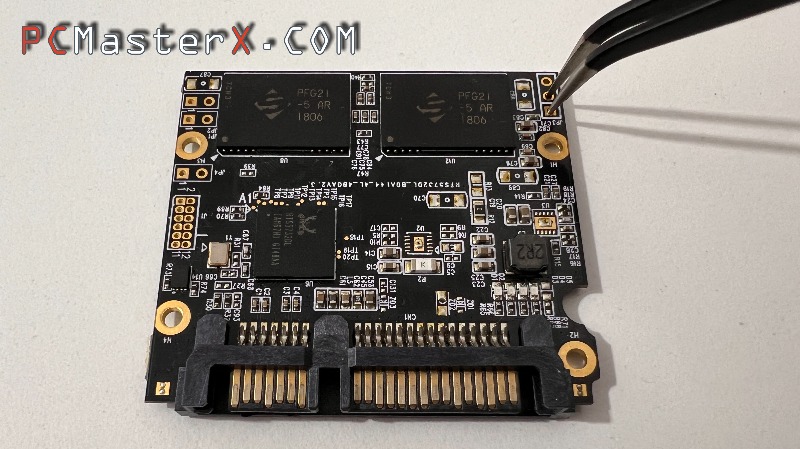
The most reliable way to confirm the exact controller model inside your drive is to open the SSD enclosure and visually check the markings stamped on the controller chip itself.
Once you locate the chip, look closely at the printed circuit board (PCB) to find the ROM pin positions. These pins are used to force the SSD into its safe/flashing mode.
Step 2: Boot the SSD into Safe Mode (Flashing Mode)
Follow this precise sequence to get the system to recognize the drive in its flashing environment:
- Place a jumper (or hold your tweezers) across the designated ROM pins on the SSD's PCB.
- While keeping the pins shorted, plug the USB to SATA adapter into your computer.
- Wait for approximately 3 seconds, then remove the jumper (or tweezers) from the pins.
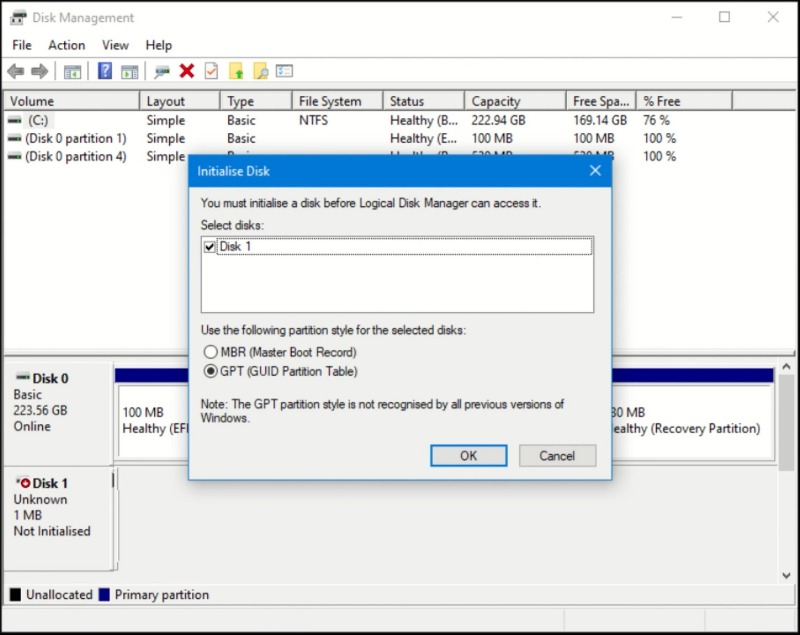
Now, open the Windows Disk Management utility to verify the status. If done correctly, the Realtek RTS5732DL controller will be recognized by the system with a capacity of exactly 1 MB, indicating it is successfully in flashing mode.
Step 3: Identify the NAND Flash Memory Chips
Finding the correct firmware involves more than just knowing your controller type; it also depends on the specific flash memory chips soldered to the board.
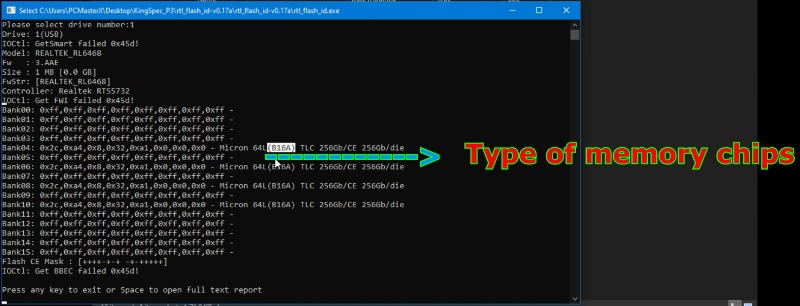
- Launch the RTL Flash ID program.
- This tool scans the drive and identifies the exact memory chips inside your SSD.
- Note down this memory information, as it is crucial for selecting the correct software package.
Step 4: Configure the Realtek SSDMP Tool
Once you have determined the exact controller and flash memory models, download the matching Realtek SSDMP (Mass Production Tool) package that includes the appropriate firmware.
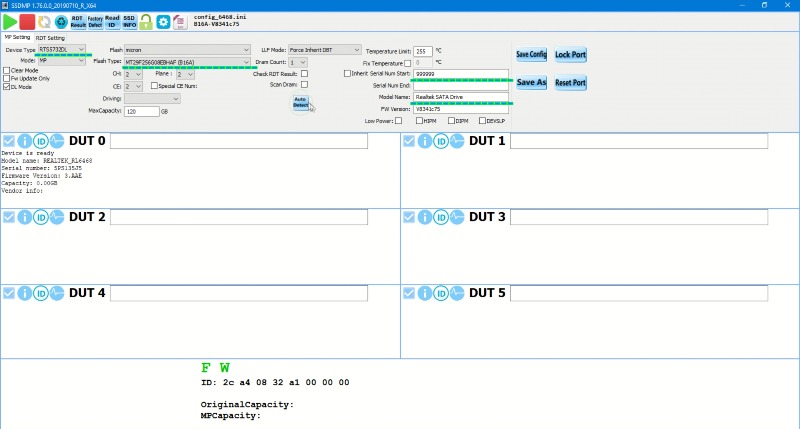
- Open the SSDMP Tool.
- Click the Auto detect button to allow the software to discover your connected SSD.
- Verify Capacity: If the tool fails to display the correct factory capacity of your drive, manually adjust and correct the SSD capacity field.
- Customization (Optional): The software gives you the option to manually type in a custom SSD model name and serial number.
- Select Controller Type:
- Select Memory Type: Choose your SSD's specific memory type either automatically or manually based on the data gathered from the Flash ID tool.
- Click Save to store your configured settings.
Step 5: Flash the Firmware
With all parameters correctly configured, you are ready to write the new software onto the controller:
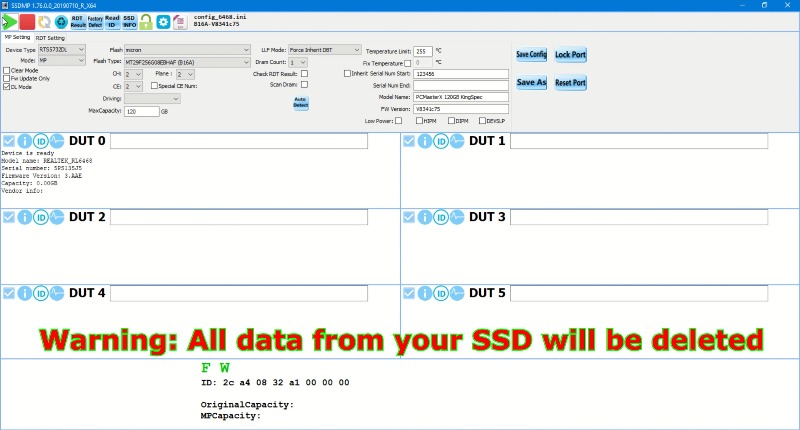
- Click the "Start Test" button to initiate the flashing process.
- Wait for the utility to complete the operation.
- Once finished, the tool will display a successful status message indicating that the SSD has been successfully flashed.
You can now safely close the SSDMP Tool.
Step 6: Initialize and Test the Drive
To force the operating system to properly register the newly repaired drive, complete these final steps:
- Power Cycle the Drive: Safely unplug the USB adapter from your computer, wait a few moments, and plug it back in.
- Format the SSD: Open Disk Management once again. The system will prompt you to initialize the disk. Create a new volume and format the drive so it becomes fully operational in Windows.
Verifying the Repair
It is highly recommended to test your revived hardware using two industry-standard tools:
- CrystalDiskInfo: Run this to review the drive's health status, operating temperature, and S.M.A.R.T. attributes post-flash.
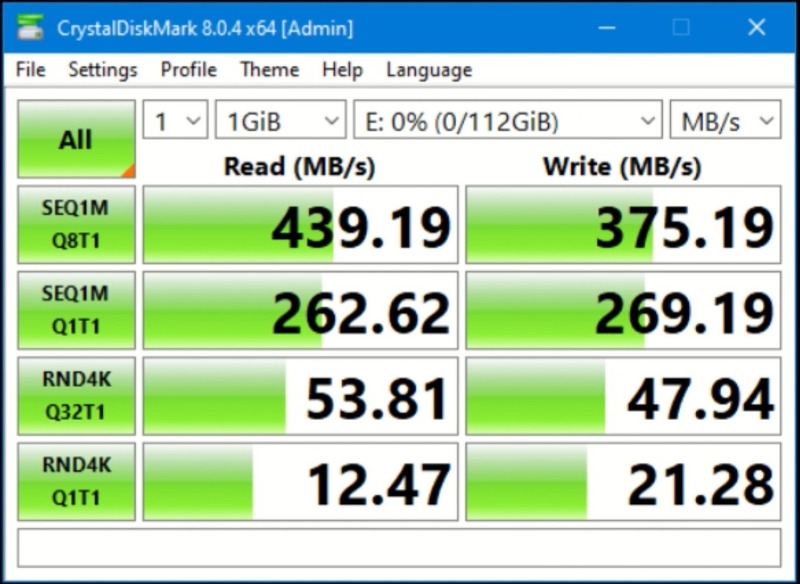
- CrystalDiskMark: Use this tool to run read/write speed benchmarks, ensuring that the SSD performs reliably at its optimal speeds.
Finally, disconnect the SSD from the SATA adapter and assemble it back into its original plastic or metal enclosure. Your SSD is saved from the electronic waste bin and ready for use!